The officiant is halfway through the vows when guests in the back rows start leaning forward. The receiver is powered on, the transmitter is clipped neatly to a lapel, and the DJ booth appears ready, but the sound cuts in and out as the ceremony moves from the garden toward the reception hall. Later, a toast-giver holds the microphone too far away, a guest brushes the antenna, and the final story disappears into room noise.
That's the practical reality behind how to use a wireless microphone at a wedding. The job involves legal frequency selection, RF coordination, receiver placement, microphone technique, battery management, gain staging, and clear handoffs between the officiant, DJ, venue manager, and speakers. On a Hill Country property with indoor halls, outdoor ceremony sites, guest phones, Wi-Fi, Bluetooth devices, and several event areas, pairing the microphone is only the beginning.
Table of Contents
- Why Wireless Microphones Make or Break Your Ceremony Sound
- Before You Power On What to Check About Frequencies and Gear
- How to Set Up and Pair Your Wireless Microphone Without Guesswork
- Positioning the Microphone for Clear Speech in Every Moment
- Battery Gain and Feedback Control During the Event
- Troubleshooting Dropouts Interference and Last Minute Fixes
Why Wireless Microphones Make or Break Your Ceremony Sound
At a multi-venue Hill Country property, the microphone may begin at an outdoor garden altar, move through an indoor hall, and end up in a toast line with several different speakers. Each change affects signal path, room acoustics, microphone technique, and who is responsible for the handoff. Pairing the transmitter and receiver is only the starting point.
A well-managed wireless system lets the officiant move without cables across the aisle, keeps vows intelligible for guests at the back, and gives the DJ a practical handheld for announcements and toasts. The result should feel ordinary to the audience: a steady voice, controlled volume, and no attention drawn to the equipment.

One event can contain several sound environments
At the garden altar, distance, wind, foliage, guests, and changes in body position can affect the radio path and speech clarity. In a stone hall, reflective walls and hard surfaces can make the same microphone sound louder, harsher, or more prone to feedback when a speaker faces a loudspeaker. The fix is not identical in both spaces. Outdoor coverage depends heavily on receiver placement and a clear path, while indoor control also requires careful speaker placement and gain.
The handoff creates another risk. An officiant may use a lavalier or headset, the DJ may take a handheld for announcements, and toasters may pass that microphone between people who hold it at different distances. Before the ceremony, identify who will mute, unmute, collect, and redistribute each transmitter. A quick instruction to keep a handheld near the mouth and away from its grille or antenna can prevent an otherwise avoidable change in level.
Practical rule: Assign one person to own the microphone from setup through the last toast.
Guest phones, Wi-Fi equipment, Bluetooth devices, and other event systems can add RF congestion, especially when several areas share the property. The operator should know which receiver serves which space, keep the receiver where its signal path remains practical, and avoid treating a successful soundcheck at one location as proof that every handoff will work.
For couples and planners, a sound plan should state which system is supplied, where it will be tested, who monitors it, and who manages each transition. The venue's broader sound system information can clarify available equipment and connections. Couples can also explore ceremony release while assigning ceremony responsibilities. Good preparation keeps the garden ceremony, Stone hall, DJ booth, and reception speakers working as one coordinated event.
Before You Power On What to Check About Frequencies and Gear
At a Hill Country property, the ceremony may begin in a garden, move into the Stone hall, and finish with toasts near the reception speakers. A microphone that passes a quick test outdoors can fail after the receiver moves indoors, especially when guest phones, Wi-Fi equipment, Bluetooth devices, and production systems add RF congestion. Check the operating plan before anyone powers up.
Start with the legal operating window
Read the transmitter and receiver labels, confirm their tuning range, and review the manufacturer's documentation and local requirements. The 617–652 MHz and 663–698 MHz ranges are no longer available for wireless microphone operation, and the 700 MHz range, 698–806 MHz, is prohibited. Depending on the equipment and authorization, permitted choices can include 614–616 MHz, the 657–663 MHz unlicensed 600 MHz duplex gap, VHF and UHF TV channels 2–36, 902–928 MHz, 1920–1930 MHz, 2.4 GHz, and 5 GHz. Check the FCC frequency and operation requirements before buying or deploying a system.
The post-auction rules make exact frequency blocks more important than a broad label such as “UHF.” Licensed users can operate in the 653–657 MHz duplex gap, while unlicensed users may use 614–616 MHz and 657–663 MHz, subject to the applicable rules. The FCC's post-incentive-auction wireless microphone guidance explains the available operating choices.
Inventory the complete signal path
Put every component on the table before the ceremony setup:
- Receiver: Match it to the transmitter and inspect the power connection.
- Transmitter: Check the bodypack or handheld, capsule, mute control, display, and battery compartment.
- Antennas: Confirm that detachable antennas are present, firmly connected, and undamaged.
- Audio cable: Identify whether the receiver feeds the mixer, powered speaker, PA, camera, or another device.
- Power and backup: Prepare charged batteries or the manufacturer-approved power solution, plus a wired microphone if available.
A receiver light only confirms that the unit has power. Confirm that it sends a clean signal to the correct mixer or PA input, then verify that the input is set for that signal type.
Scan at every operating position
Turn off all transmitters before scanning. The receiver or coordination software needs to measure the venue's RF conditions without your own microphones masking usable channels. Scan at the garden ceremony position and again in the indoor reception hall. Repeat the check if the receiver will move, antennas will change, or the signal path will be blocked by walls, staging, or equipment.
A technical guide from Shure recommends scanning first, selecting a compatible frequency group, assigning unique channels, and syncing transmitters one at a time. It also describes channel spacing of 300 kHz to 1.5 MHz, depending on receiver selectivity, and recommends keeping receiver antennas high, clear, and at least 30 cm apart in dense setups. Follow the Shure wireless microphone operation guidance for the system's coordination method.
Make RF testing part of the site walk with the venue's event inspection checklist, rather than leaving it until guests arrive. Record which receiver serves each space and who will carry it during the handoff from officiant to DJ or toasters.
How to Set Up and Pair Your Wireless Microphone Without Guesswork
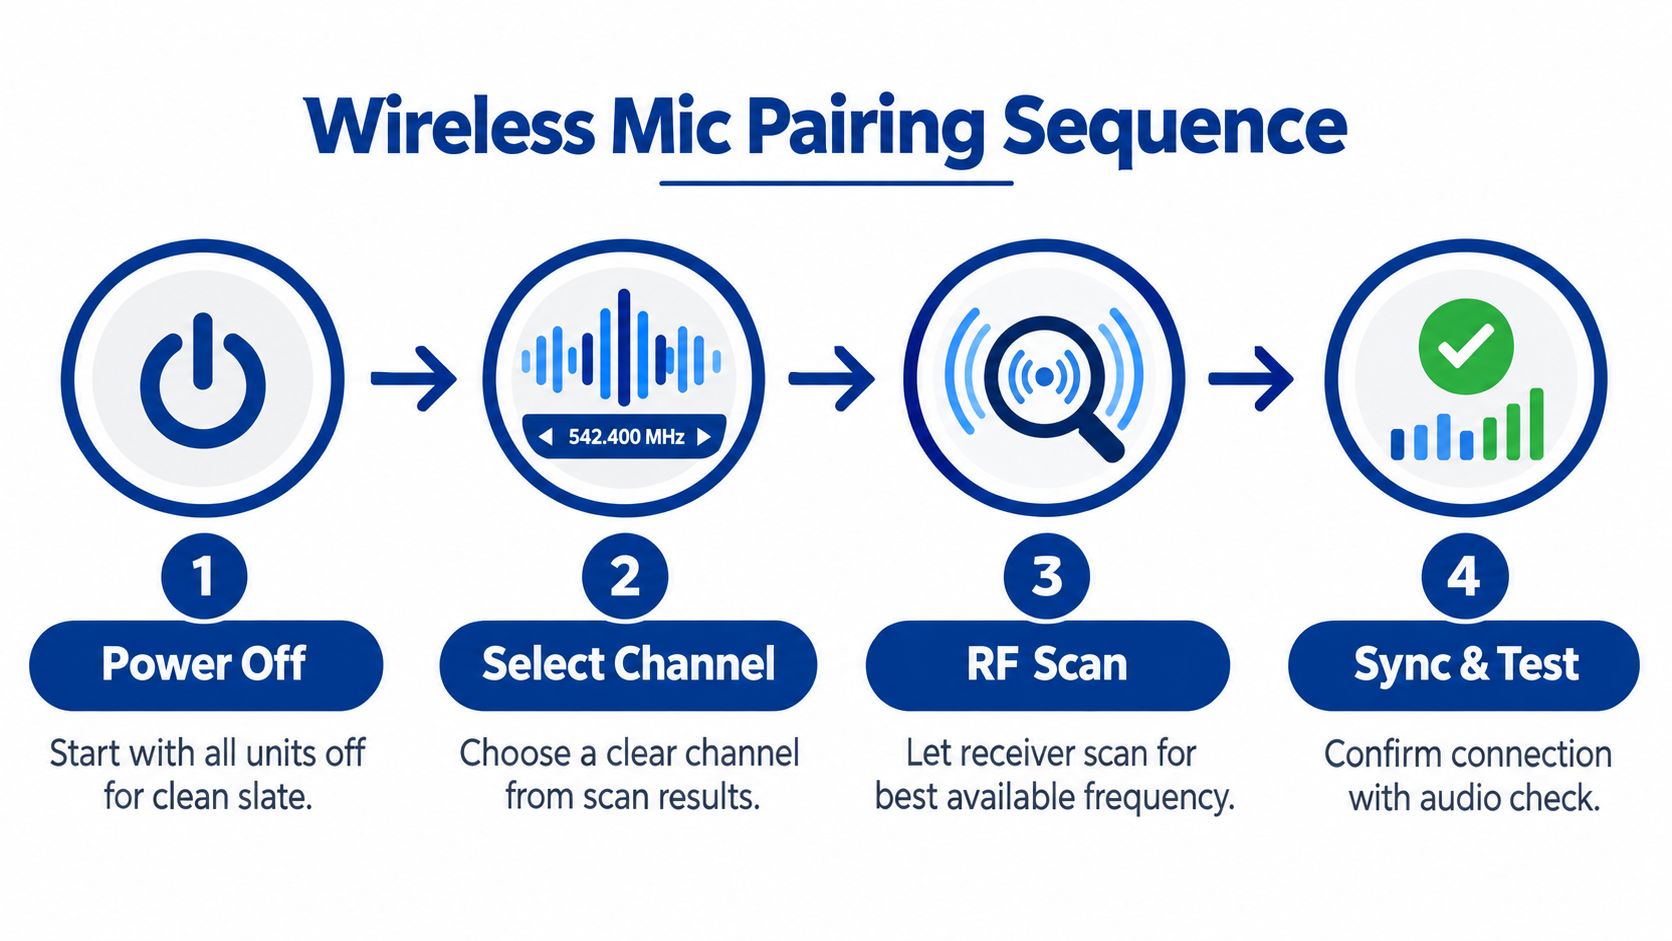
A dependable pairing routine begins with a clean slate. Set the receiver at the position where it will operate, connect it to the PA or mixer, and keep every transmitter powered off. This prevents an active transmitter from influencing the scan and makes it easier to identify which unit is connected during the handoff.
Establish the receiver position first
Place the receiver high, clear, and as close to the performance area as practical. Keep antennas away from large metal surfaces, racks, power equipment, and dense bundles of electronics. A microphone specialist recommends keeping the receiver antennas 15–30 cm from metal and about 10 feet from Wi-Fi routers and other strong emitters, while maintaining a clear path to the transmitter. The wireless microphone placement guidance from AVNetwork gives additional context for avoiding shielding and interference.
Connect the receiver's output to the mixer or powered PA input. If the system uses a wired connection, seat the cable fully at both ends and choose the correct input type. If the equipment supports Bluetooth for a separate audio source, treat Bluetooth as an accompaniment or playback connection, not as a substitute for properly coordinating the microphone's RF link.
Scan, select, and sync in order
Run the receiver's RF scan with all transmitters off. Choose a compatible group or clear channel from the scan results, then assign a unique channel to each microphone. In a ceremony with an officiant, a couple's microphone, and a reception handheld, don't leave several transmitters on the same channel or rely on a factory default.
Power on and sync one transmitter at a time. Confirm that the receiver identifies the intended transmitter before moving to the next unit. Label the transmitters by job, such as “officiant,” “handheld,” and “backup,” so the DJ or venue manager can make a handoff without guessing.
Soundcheck habit: Speak at the loudest normal level the person will use, then set the input gain at the mixer. Don't solve a quiet mixer channel by overdriving the transmitter.
Wireless systems add gain stages before the signal reaches the speakers. A transmitter set too aggressively can clip even when the receiver appears connected. A low transmitter level forces the mixer to add more gain, which can raise room noise and make feedback easier to trigger.
Walk the actual coverage area
Pairing is not a soundcheck. Have the officiant walk from the ceremony entrance to the altar, then have the handheld travel through the aisle, stage, dance floor, and toast position. Listen for signal instability while watching the receiver indicators and mixer meter.
Repeat the test after the indoor transition. A receiver position that works beside the outdoor ceremony site may be poor once the system is moved behind a wall, inside a cabinet, or near a metal structure. If you use software or automated tools to assist with levels, an AI audio mixing tool may help with broader audio preparation, but it doesn't replace an on-site RF scan, walk-test, or a human listening check.
Finish with a short spoken test and playback when the system permits it. Confirm that guests can hear consonants clearly, that the microphone isn't muted, and that the PA input is the intended channel. Then tell every operator exactly which microphone is live and which units remain muted.
Positioning the Microphone for Clear Speech in Every Moment
Microphone choice should follow the speaker's movement and responsibility, not appearance alone. A handheld gives the DJ and toast-givers clear control, but it depends on consistent distance from the mouth. A lavalier keeps both hands free, though clothing movement, necklaces, wind, and rubbing fabric can affect the sound. A headset often delivers the most consistent mouth-to-mic distance for an officiant who moves or turns frequently.
| Microphone Style | Best For | Placement Tip | Watch Out For |
|---|---|---|---|
| Handheld | Toasts, DJ announcements, readings, and planned handoffs | Hold the capsule toward the mouth and keep a steady distance while speaking | Passing it between people, pointing it at speakers, or holding it too far away |
| Lavalier | Officiants, presenters, and speakers who need both hands free | Clip it securely to the lapel or upper garment where clothing won't brush the capsule | Fabric noise, necklaces, wind, and a blocked capsule |
| Headset | Active officiants, presenters, and speakers who turn away from a stand | Position the capsule consistently near the side of the mouth without touching the cheek | Hair, glasses, handling noise, and feedback if the speaker moves toward a monitor |
Match placement to the ceremony
For an officiant, a lavalier or headset usually keeps the voice consistent while hands gesture and the speaker turns toward the couple. Clip a lavalier where the capsule remains exposed, not beneath a jacket fold or scarf. If the officiant will walk between indoor and outdoor areas, secure the cable or bodypack so clothing movement doesn't pull on it.
The couple's vows often need a different plan. A handheld can produce clear results when the speaker knows to keep it near the mouth and point it toward the person speaking. If the couple shares one microphone, rehearse the handoff so the microphone travels with the speaking turn rather than drifting down toward the waist.
For outdoor ceremonies, use the manufacturer's wind protection and listen for wind rumble during the walk-test. A scenic location can still have airflow that overwhelms a small capsule.
Make the handheld handoff boring
The best handoff is invisible to guests. The DJ or coordinator should tell each toaster where to stand, which end of the microphone faces the mouth, and how close to hold it. Don't let a speaker tap the capsule, blow into it, or point it toward a loudspeaker to check whether it works.
During reception speeches, keep unused microphones muted at the mixer or receiver when possible. A live microphone lying on a table can pick up clatter, conversation, and feedback. The DJ should unmute it only when the speaker is ready, then mute it immediately after the speech.
Speaker briefing: “Hold it near your mouth, speak across the top, and keep it in the same hand for the whole toast.”
That one instruction prevents many volume swings. It also gives the operator a predictable source to manage while the room changes from dinner conversation to applause and back again.
Battery Gain and Feedback Control During the Event
At a multi-venue property, battery and feedback checks must follow the schedule, not memory. The ceremony may begin outdoors, move indoors for weather, then hand the same equipment to the DJ for announcements and toasters. Guest phones and other devices can also add RF congestion, so the operator needs a repeatable handoff plan.
Check transmitter batteries before the ceremony, again before reception announcements, and after a long break. Keep charged spares at the DJ booth or sound position, rather than in a vehicle or dressing room. Change batteries during a quiet transition, then test the microphone before giving it back to the officiant, DJ, or speaker.
Write the microphone assignment on the event sheet. Note which system serves the ceremony, which handheld goes to the DJ, and where the backup is stored. If the ceremony moves indoors, notify the sound operator before carrying equipment inside. Receiver placement, monitor position, and channel status should be checked again after the move.
Run levels from the operating position
Set the initial gain during soundcheck as described in the previous setup section. During the event, monitor the mixer and PA from the position where the operator will work, then make small corrections as the room changes. Outdoor speech, indoor vows, dinner conversation, applause, and dancing all produce different sound levels.
Keep unused receiver and mixer channels muted. An open microphone on a table hears chair movement, clatter, and nearby conversations. The DJ should unmute the assigned channel only when the speaker is ready, then mute it immediately after the announcement or toast.
Keep monitors and microphones apart
Feedback occurs when amplified sound returns to a microphone and loops through the system. Place monitors or powered speakers in front of the microphone's pickup direction, not behind or directly beside it. During an indoor ceremony, watch headset and lavalier users closely because they may move toward a wall or monitor without noticing.
If feedback starts, lower the affected channel first. Move the microphone or monitor, then reduce that channel's level. Use equalization only after correcting the physical placement. This protects the rest of the room mix while the operator handles the source of the problem.
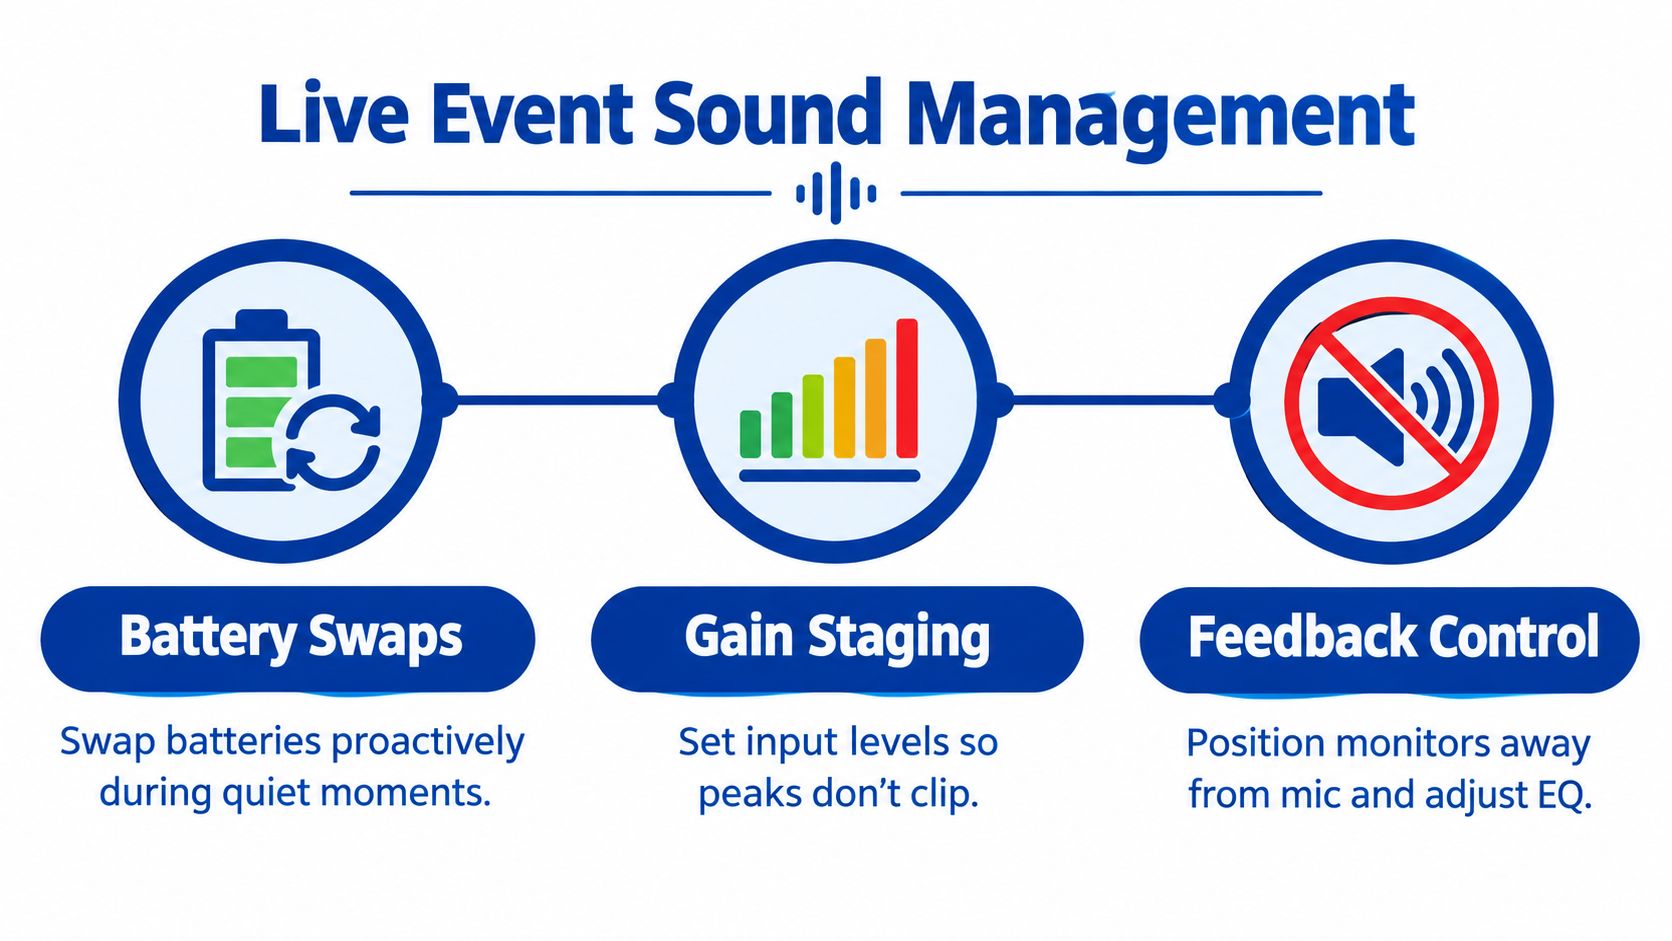
A short battery check before each handoff prevents a quiet failure during a vow, introduction, or toast. Keep the replacement and assignment sheet at the sound position, where the operator can act without leaving the event.
Troubleshooting Dropouts Interference and Last Minute Fixes
Wireless microphones aren't plug and play in the operational sense. Recent guidance identifies interference, weak batteries, and obstacles between transmitter and receiver as common causes of dropouts, while venue-focused RF guidance also emphasizes crowded spectrum and the need for coordination. A microphone can pair successfully and still fail when the speaker walks behind a structure or a guest device becomes part of a congested RF environment. See the practical dropout guidance from DJI and the event-planning discussion of RF congestion from WBSAV.
Diagnose by symptom
- Dropout or silence: Check the battery, receiver indicators, antenna connections, and line of sight. Move the receiver higher and closer to the coverage area, then re-scan if the environment has changed.
- Static or bursts: Suspect RF congestion, a poor channel choice, or antenna placement near metal and electronics. Mute the transmitter, scan again, and assign a compatible clear channel.
- Low volume: Check the microphone's mute state, capsule position, transmitter gain, mixer input, and speaker distance. A handheld held near the waist will sound quiet even when the radio link is healthy.
- Feedback: Lower the affected channel, move the microphone away from the speaker or monitor, and keep the pickup pattern pointed away from amplified sound.
Keep a wired microphone ready for the ceremony and toasts. It won't solve every logistical problem, but it gives the DJ or venue manager a fast fallback when RF conditions change at the worst possible moment. Use the final event walkthrough checklist to confirm the backup, receiver position, batteries, and speaker assignments before guests arrive.
A calm operator also protects the speaker experience. Tell the officiant or toaster where to hold the microphone, avoid announcing technical problems from the front of the room, and make the correction away from the couple whenever possible.
Texas Old Town provides indoor and outdoor event settings, PA systems with Bluetooth hookup, a wireless microphone with stand, and on-site management across its Kyle, Texas property. For a wedding or event where ceremony transitions, microphone handoffs, and sound checks need practical coordination, visit Texas Old Town to discuss the available spaces and event setup.